Archives 2020

vegan broccoli cheddar soup blog graphic

The perfect dish for the season

Cold winter days make me think of cozy fires, a stack of my favorite books in my favorite nook, and the yummy goodness of a rich and savory soup. This vegan broccoli cheddar soup has quickly become a favorite of mine. While I love hearty vegetable soups during cold days in general, I’ve grown much more appreciative of tasty vegan soups and stews.

My philosophy

Over the years I’ve learned to appreciate the beauty of each season and more recently, to cherish every moment. The fall and winter months are great opportunities to get creative with your recipes during this time of year. With the unique variety of vegetables during the colder months of the year, I love to select vegetables and spices that nourish and support the body during the cold and flu season.

It turns out, this vegan broccoli cheddar soup recipe is perfect for just that!

More about seasonal vegetables and fruits

I love the challenge of creating yummy and healthy meals using products that are in season and are ethically and sustainably sourced. Fall veggies ring in a new season of goodness and are a great opportunity to learn more about where my food comes from. Are you making the right choices when it comes to what’s on your plate?

Some of my favorites and staples

I love hardy greens with collards and kale being two of my favorites because they’re so versatile in both salad bases and cooked dishes. Unlike spinach, they hold up well for both cold and hot recipes. Obviously, today’s recipe does not include either but instead uses a combination of root vegetables and broccoli (added at the end ).

My basic rule for ALL of my recipes

Nearly every dish I make must have a full-bodied flavor profile and incorporate gut-friendly and anti-inflammatory properties. This is a massive issue for me as I have struggled off and on with digestive maladies and have fully dived into the benefits of using spices and other ingredients that promote gut health. Squash is another Fall favorite of mine. But for this dish, I’m organic carrots, sweet potato, Yukon gold potatoes, onions, herbs, and spices. The oven with a savory blend of fresh garlic and herbs to complete this vegan dish. If you don’t like sweet potatoes, you can omit this ingredient, but I personally think it not only adds more nutrients but rounds out the flavor.

Vegan broccoli cheddar soup pinterest graphic

About the ingredients

All of the ingredients are either organic, locally sourced, or both. I’ve also made it a point to also use gut-friendly spices and herbs to help support healthy gut bacteria and my immune system. With everything that’s going on, using natural herbs and spices to boost the body’s natural defenses is a must. Personally, I’m not a fan of using a lot of pharmaceutical-based remedies for non-acute situations. This is why I tend to view my food more as medicine wrapped in deliciousness!

What you will need for this vegan broccoli cheddar soup

  1. Broccoli (fresh lightly steamed)
  2. 1 medium-large sweet potato
  3. Yukon gold potatoes, 2 medium
  4. yellow or red onion, chopped (1small)
  5. clove garlic (1)
  6. 1 cup unsweetened full-fat organic coconut milk
  7. 1 cup unsweetened plain organic almond milk ( you can use 1/2 cup raw almonds, I prefer almond milk)

More of your ingredients

  1. 1/4 cup mini Bella mushrooms (optional)
  2. chopped green onions, 1/4 cup
  3. Garlic powder, 1 tablespoon
  4. 1 tablespoon Onion powder
  5. turmeric powder, 1 tablespoon
  6. 1/2 cup nutritional yeast
  7. 1 tablespoon mustard powder
  8. 1/2 teaspoon of spicy paprika

Bringing it all together

I eliminated some steps to make the recipe more straightforward; no need to add raw cashews or almonds that need to be blended, etc!. Just give me the delicious without all of the drama is what I say! So with that in mind, first boil down the potatoes with the seasoning spices until they are soft (approx 20mins on medium heat). Next, add in your vegetables and let them simmer with the potatoes, creating a soupy mixture. After the mixture has slightly thickened, add in the nutritional yeast and pour your mixture into the blender and blend until it’s smooth. Be sure to lightly chop and steam your fresh broccoli and add it to your soup after it’s fully blended and allow the soup to lightly simmer on low heat for another ten minutes. You can serve your soup with crackers, toast or cornbread and simply enjoy a bowl of this  deliciouness!

Another recipe for the fall and winter months

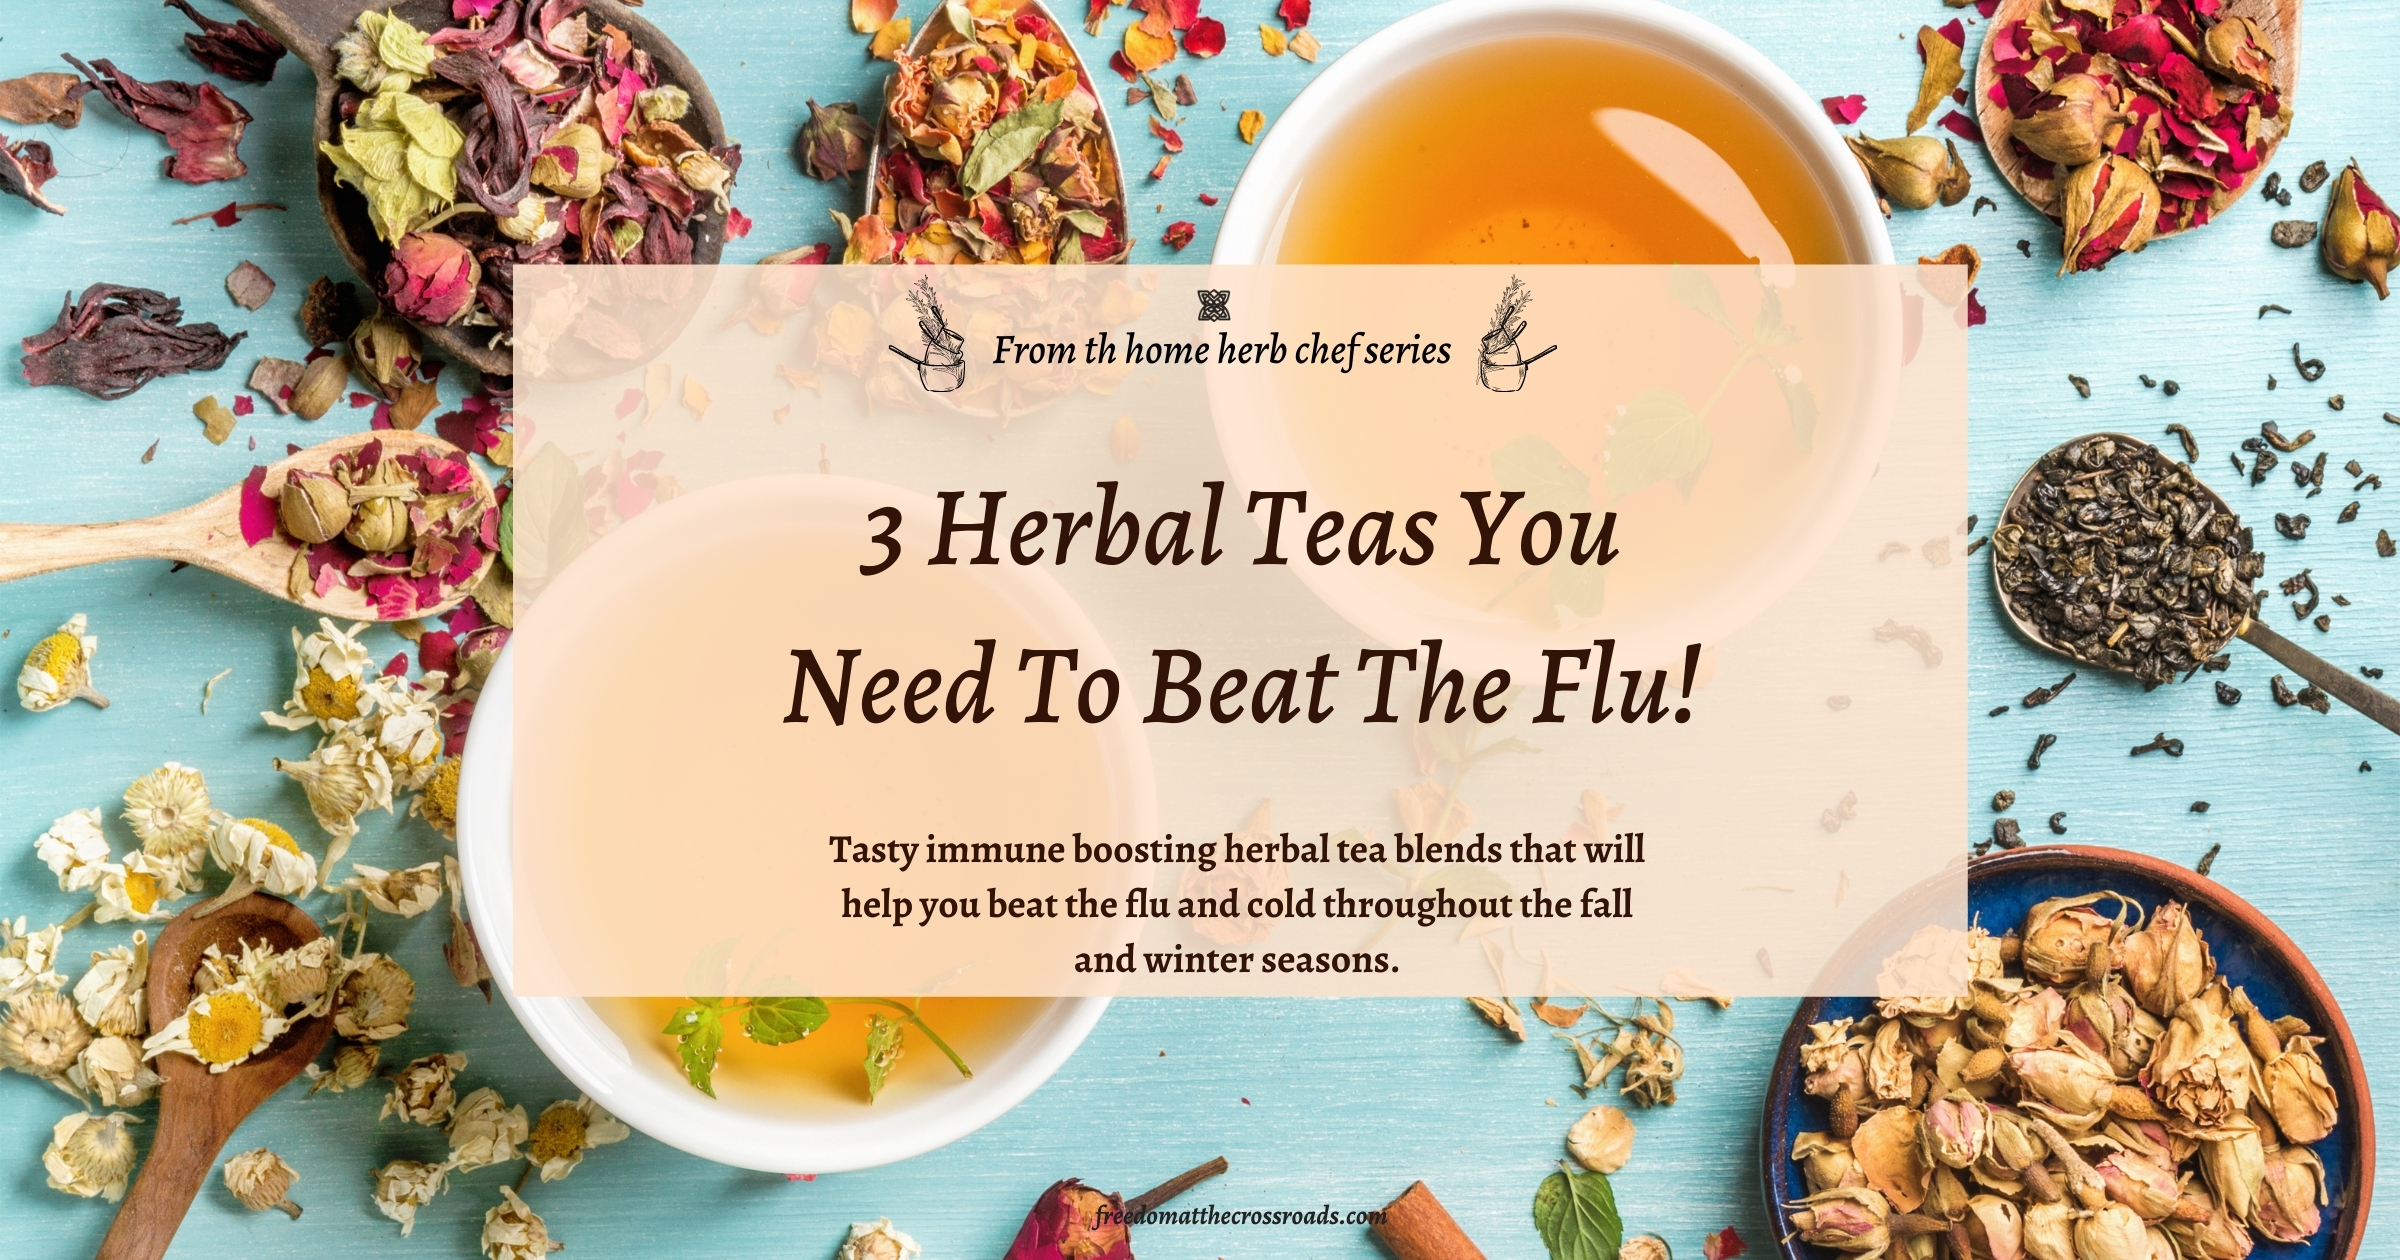
Have you tried any of my other recipes yet? Click here for some awesome tea recipes to help support your body’s natural defenses during the cold and flu seasons! Plus, these recipes are great recovery teas throughout the year.

About the author

Tonye Tariah is a Holistic Health Strategist, Coach, and the founder of Freedom at The Crossroads Blog. Tonye helps free women from inaction and unhealthy habits so they can get fit, healthy, and live free. Her belief is that “the cookie-cutter method only works for cookies”. Meaning, she helps each woman in a way that is unique to each her situation. By doing this, she’s better able to help women transform their lives from the inside out. Her ultimate goal is to help women become healthy

Vegan Broccoli cheddar Soup

A hair-strengthening moisturizing spray infused with anti-oxidant-rich essential oils

Everyone knows winter can be brutal on your natural locs and that’s even more true for 4C natural hair. When I first moved to the Midwest (I’m in Illinois, USA), the tole that winter takes on my natural hair was the biggest shocker!

These days, I’ve tried just about every moisturizer and deep conditioner for my hair type. Sadly, while some do a more than adequate job I still prefer my own DIY recipes to store-bought brands. To say that I’ve spent a lot of money on various hair care brands is an understatement.

Making your own

In general, I’ve found that homemade recipes work best for my hair in combination with a select number of store brands. Everyone’s hair is different but in general, find out your hair type and what products work best for it.

High porosity vs. low porosity hair

Based on my experience and personal research on my hair type, I have 4C very low porosity hair. Which means it takes a lot of TLC and conditioning to keep it healthy. That includes washing, conditioning, and moisturizing depending on the season’s needs.

In general, Low porosity hair has a tightly bound cuticle layer, making it difficult for moisture to penetrate while high porosity hair has gaps and holes in the cuticle, allowing moisture to easily pass in and out. I like the detailed explanation given by Dr. Kari Williams in an article published by shape magazine in July of this year.

SOME CHARACTERISTICS OF HIGH AND LOW POROSITY HAIR

If you’re still unsure about whether or not you have high porosity hair (after performing the “float test”), just remember that high porosity hair takes in (and loses) moisture the fastest. By the same general rule,  low porosity hair takes in moisture more slowly and loses it slowly too. Keep in mind that these distinctions don’t address the full range of porosity by any means. Consult your stylist or haircare professional for an in-depth analysis of your hair type and needs. My recipes reflect what’s been working for me and my family on our natural hair care journey.

A BRIEF DESCRIPTION OF WHAT 4C HAIR LOOKS LIKE

4C hair is made up of tight coils and is typically, extremely wiry and fragile in nature. Most of the time, it appears to be coarse but is actually very fine. When looked at closely, you can see that 4C hair is made up of several thin hair strands densely packed together. I like to call it “high maintenance ” hair because it tends to be the hair type most prone to shrinkage and dryness which in turn makes it vulnerable to breakage. However, with the proper TLC, it grows long and thick!

WHAT YOU NEED FOR THIS DIY MOISTURIZING SPRAY FOR 4C HAIR

  1. 3.4 oz spray bottle (or larger)
  2. 8 drops of rosemary essential oil
  3. 2 drops of tea tree essential oil
  4. 3.4 oz filtered or distilled water
  5. 1 tablespoon of cold-pressed castor oil
  6. 4 drops peppermint essential oil
  7. 1 teaspoon organic raw coconut oil

HOW TO PREPARE YOUR DIY SPRAY

Pour the filtered or distilled water into your bottle and carefully add your essential oils to it using a dropper. Next, take a small funnel and add the castor oil and the coconut oil to the mixture. If the raw coconut is solid, simply place the container in a  shallow bowl of hot water until it becomes liquid. I also add approximately 3 drops of organic apple cider vinegar to help emulsify (incorporate) the oil with the water in the mixture. You can then section your hair into quarters, spray each section until fully saturated, and gently work throughout the hair and scalp. Place a plastic cap over your hair and for about an hour and then air-dry. You can then style your hair as usual. It works very well as a moisturizer and anti-itch spray for protective styles and braids!

BENEFITS OF EACH INGREDIENT

When I first created this DIY moisturizing spray for 4C hair, which is my hair type, by the way, I looked for ingredients that nourish not just the hair but the scalp as well. Rosemary, tea tree, and peppermint essential oils all nourish and heal in similar ways. Rosemary boosts hair growth, is anti-microbial, increases blood circulation/flow to the hair follicles. It also helps to strengthen the hair as well as add shine and body. Peppermint is cleansing and stimulates the scalp as well. ACV or apple cider vinegar cleanses the scalp and gets rid of build-up on the hair and is also antimicrobial. Castor oil helps to nourish and seal in moisture and smoothes the hair cuticles while coconut oil does the same as well as infuse antioxidants and other nutrients to the hair.

BOTTOM LINE

Adding a moisturizing spray to your hair care routine will make a big difference in the length and health of your hair during those cold fall and winter months. But you also need to make sure that you’re eating a healthy diet loaded with natural goodness. I’ve also made it a point to take supplements as well particularly in the winter when our immune systems generally take a hit and certain am low on those sunshine nutrients (i.e. vitamin D). Always be sure you consult your doctor/dermatologist before you try any of these recipes if you have any allergies to any of these ingredients or you are taking a medication that might be affected. Remember, you are what you eat, so be good to yourself!

BEFORE YOU GO!

FOR ANOTHER AWESOME DIY HAIR RECIPE CHECK OUT MY ALL-NATURAL ACV AND ROSEMARY ESSENTIAL OIL HAIR RINSE RIGHT HERE!

ABOUT THE AUTHOR

Tonye Tariah is a Holistic Health Strategist, Coach, and the founder of Freedom at The Crossroads Blog. Tonye helps free women from inaction and unhealthy habits so they can get fit, healthy, and live free. Her belief is that “the cookie-cutter method only works for cookies”. Meaning, she helps each woman in a way that is unique to each her situation. By doing this, she’s better able to help women transform their lives from the inside out. Her ultimate goal is to help women become healthy and empowered through the transformative self-care journey!

DIY Moisturizing Spray For 4C Hair

3 herbal teas you need to beat the flu blog feature image

I’m all about getting ready for the fall and winter seasons and that also means up-ing my self-care game. If ever there was a year to really commit to self-care and optimizing our wellness, this is the time to do it and that means pulling out my 3 herbal teas you need to beat the flu this season!

My take on herbal remedies

Also, since I’m someone who hates getting sick and having to take medicine, I’ve really been diving into traditional herbal remedies, etc. That’s not to say that I don’t use conventional medicine. I do. It’s simply my personal belief and experience, that conventional medicine is better for acute conditions. Plus, I believe it’s better to support the body’s natural systems rather than throw synthetic chemicals into a natural system.

My belief about herbal remedies

It worked for my ancestors, and I’ve since learned and agree, that it’s better for my own health and wellness. I’m a firm believer that the cure for any condition should never be worse than the actual sickness itself. Having said that, when in doubt seek advice fr your medical doctor, a certified naturopathic doctor, trained healthcare professional, etc.

**As always, make sure you check with your healthcare provider to ensure that these ingredients are safe for you to consume, especially if you have medical conditions or medicines that might interact with any of these ingredients!!
**Please also note that this post contains affiliate links and as an Amazon Associate I earn from qualifying purchases.

Herbal teas for your home remedy cubby

Almost every culture has its own version of herbal teas, tinctures, and infusion. So it comes as no surprise that in this day and age, we’re all bringing in out these old tried and true recipes.

As a matter of fact, the more we learn and share from one another the better. Even now, I’ve got new twists on old recipes and created some new ones too.

The 3 herbal teas you need

Every year I add new favorites to my list of tea must-haves for throughout the year. But these are 3 herbal tea blends you need to beat the flu season for sure! Just an FYI, this post does include affiliate links from which I receive a small percentage at no cost to you!

  1. Elderberry echinacea spiced tea.
  2. Ginger Rosehip tea with chamomile, which is great for the nighttime and promotes restful sleep.
  3. Spiced Mint  Turmeric tea.


A few benefits from these recipes

Star anise:

The oil produced by star anise contains thymol, terpineol, and anethole, which is used for treating cough and flu. Anise also helps improve digestion, alleviate cramps, and good for reducing nausea. Consuming star anise tea after meals helps treat digestive ailments such as bloating, gas, indigestion, and constipation

Black peppercorn:

 This spice has anti-inflammatory properties as well. It also improves circulation and reduces pain and swelling of joints in between the fingers. Plus, it helps fight diseases like high blood pressure, diabetes, and heart disease.

Chamomile:

This is one of my favorites ingredients and is included in the 3 herbal teas you need to beat the flu and cold because of its soothing effects. Chamomile promotes sleep, soothes stomach aches, reduces stress, period pains, helps with anxiety, and is also anti-inflammatory. Its benefits are too many to list here alone, but you’ll definitely want to keep this one handy!

Mint:

Mint eases digestion, is antiviral and antibacterial. It also has anti-inflammatory properties and helps with mucous build-up.

Echinacea: 

Widely known for its many health benefits, echinacea reduces inflammation, improves immunity, and lower blood sugar levels. Also, it’s used as a natural pain reducer, helps with digestion as well as skin-boosting benefits too!

Elderberry:

Many people believe elderberries to be one of the most potent natural plants for fighting cold and flu viruses. Not only that, they are loaded with antioxidants, vitamins, boosts, fights infection, and supports the immune system. You can read more about the power of elderberries in my earlier recipe post here!

Turmeric: 

This root is an anti-inflammatory, is a potent antioxidant, and supports joint health.

More beneficial spices

Ginger:

Great for immune boosting, ginger is also an anti-inflammatory, anti-microbial, improves digestion, and supports cardio health.

Raw honey:

Raw honey has many health benefits including anti-inflammatory and antibacterial properties as well as rich in anti-oxidants. Honey is also excellent for soothing sore throats and digestive issues.

Srilankan cinnamon: 

Also known as Ceylon cinnamon, this spice is also anti-inflammatory and antimicrobial. It’s also a great antioxidant with cancer-fighting properties too!

Allspice:

Another favorite of mine, allspice helps relieve gas, bloating, and stomach upset. Did I also mention, it too has anti-inflammatory benefits?

All your ingredients

  1. Echinacea (I use dried echinacea)
  2. Elderberry (dried)
  3. Mint (fresh mint is preferred for this recipe)
  4. Black cardamom
  5. Star anise (whole) or ground
  6. Ginger (fresh or powdered)
  7. Turmeric (I use the powder for convenience)
  8. Black peppercorn
  9. Raw honey
  10. Rosehips (whole)
  11. Chamomile (dried)
  12. Srilankan cinnamon
  13. Allspice (ground)

All about the teas

On a quick note, I only use organic and naturally sourced ingredients in my tea because I always want to make sure that I’m not using anything that has pesticides or is contaminated. Having said that, some of my sources are available on amazon.com and you can just click on those links or source the ingredients yourself! As always, don’t forget to consult your healthcare provider before using any of these ingredients as some may cause drug interactions, allergies, etc for some individuals!

The big 3 recipes for me!

  1. Spiced elderberry and echinacea tea: 2 teaspoons dried elderberries, 1 teaspoon echinacea, 1/2 teaspoon ginger powder, 1/4 teaspoon allspice with raw honey and lemon to taste.
  2. Ginger rosehip tea: 1 teaspoon ginger powder, 1 teaspoon dried rosehips, 1/4 teaspoon echinacea, 1/4 teaspoon black peppercorn, 1/4 teaspoon star anise, plus raw honey and lemon to taste.
  3. Spiced mint turmeric tea: 1 teaspoon organic turmeric powder, 1/2 cup fresh cut mint, 1/4 teaspoon fresh grated ginger, 1/4 teaspoon allspice, 1/4 teaspoon black peppercorn, with raw honey to taste

A few tips about herbal teas

Since these are herbal teas, they are caffeine-free and can be taken throughout the day. Also, these ingredients need to be steeped in hot water since these ingredients are the more delicate parts of their parent plants. These include the leaves, berries, flowers, and seeds used in all three recipes.

Making your herbal tea (infusion)

To make your tea blends, combine all the ingredients, pour hot water over all the ingredients in a large glass cup (or kettle), steep (aka, infuse) for 30-45 minutes. This will maximize the extraction of all those flu and cold-fighting properties! When you’re ready to drink your tea, simply add your honey and or lemon to taste. You can also drink these cold or hot after your infusion time is complete and each recipe creates enough for at least two cups. Enjoy!

Before you go

This the perfect time to start preparing for the cold and flu season but there’s also no need to panic if you’ve taken the time to add some home remedies to your medicine cabinet. Add that to your self-care and fitness strategies (read the post right here) and you’ve got the recipe for a healthy you this season!

Also, take the opportunity to get more support for your fitness and self-care journey with one of my transformational programs right here! Need to take baby steps? Start here!


About the author

Tonye Barango-Tariah is a Holistic Health Strategist and founder of Freedom at The Crossroads Blog. She helps free women from inaction and unhealthy habits so they can get fit, healthy, and live free. Her belief is that “the cookie-cutter method only works for cookies”. This means that she helps each woman in a way that is unique to each woman. By doing this, she’s better able to help them transform their lives from the inside out. Her ultimate goal is to help women become healthy and empowered through the transformative self-care journey!

3 Herbal Teas You Need To Beat The Flu!

5 womens fitness and selfcare tips for the season feature image

Staying fit and healthy through the holiday season

We all know how busy the holiday season can get especially when you’ve got multiple tasks to juggle. Let’s not even talk about trying to maintain a healthy lifestyle! This is why I’ve pulled together 5 women’s fitness and self-care tips to get you through the holidays!

The holidays can be super emotional around this time of year, given what we’re all dealing with globally. But we can’t allow our health and wellbeing to suffer because our bodies need all the support we can give them. This is true particularly for women, with multi-tasking and trying to stay on budget. A lot of us or our neighbors have lost jobs, fallen sick with, lost loved ones, etc.

What can we do to stay healthy (even during a pandemic)?

Even if we feel like we have no control over what’s happening locally and globally, there are a ton of things we can do to not just stay healthy, but make our lives more meaningful and infused with joy this holiday season. You don’t need a lot of money or complicated skills to do a lot of little things that will make a huge difference for the mind-body-soul connection.

With these 5 women’s fitness and self-care tips, you’ll be able to carve out time for yourself without getting overwhelmed. Part of being there for your family means being there for yourself when you give your needs the attention they deserve.


With that in mind here are a few powerful tips you can get and stay in “shape” this season

These are just a few tried and true solutions I’ve used over the years for myself as well as clients. The key takeaway is that you are the only one who can make these changes in your life. No one can or will do this for you so if you want to get healthy and stay that way even in tough times, do the work.

1. Start your day with a 5-10 minute “self-check” session. Lay in bed or sit in a quiet place and just take stock of how your body feels, your mood, and your general mindset. This will help ground you as well as keep you from stressing out at the start of your day.

2. Get your body moving (formal exercise or just a quiet walk). When you get your body in motion it triggers the release of those “feel-good” chemicals in your brain, releases tension, and increases focus. It’s good for your cardiovascular system as well as your mental health.

3.  Take 10-15 mins to meditate and set your intentions for the day. This allows you to focus on the activities that will give positive results rather than the negative. There is a lot of truth to the phrase “create your happy”. When you direct your thoughts and energy to those things that yield “good” outcomes, etc you’re less likely to get stressed out and overwhelmed. You feel more aligned, in control as well as focused on the things you want to achieve.

Now for the internal

4. Drink a cup of daily detox tea, water, or smoothie. If you need a few ideas, start with my super green smoothie right here!  Also, this recovery smoothie is awesome as both a  post-workout and a detox smoothie. The ingredients have anti-inflammatory as well as nutritional benefits. This helps to cleanse the body of harmful toxins, by-products of chemical processes in the body as well as support your body’s natural self-healing abilities.

5. Substitute healthy ingredients for “unhealthy” ingredients in your favorite fall and winter must-have meals. That also includes “detoxing” your fridge and pantry so that you have budget-friendly healthy meal options. If you’re  not sure where to begin, grab my FREE Pantry Detox Gude GUIDE HERE

Also, for a complete Introductory Produce, Shopping Guide grab a copy HERE!!

Final thoughts

Be grateful for those little things in our lives that create beauty in their simplicity.  Also, stop focusing on the things that are beyond your control and literally choose joy and positivity instead of the negative. This will also help you feel better physically and less drained energetically. Remember, you’ve got this and you are not alone!

About the author

Tonye Tariah, Holistic Health Strategist and founder of Freedom at The Crossroads Blog. She helps free women from inaction and unhealthy habits so they can get fit, healthy, and live free. Her belief is that “the cookie-cutter method only works for cookies”. This means that she helps each woman in a way that is unique to each woman. By doing this, she’s better able to help them transform their lives from the inside out. Her ultimate goal is to help women become healthy and empowered through the transformative self-care journey!


5 Women’s Fitness and Self-care Tips for this Season

spiced elderberry and echinacea tincture blog feature image

Why a spiced elderberry and echinacea tincture?

With everything that’s happening today (i.e. global pandemic), this certainly isn’t the time to neglect your health. That’s why I’m pulling out my spiced elderberry and echinacea tincture today!  Fall and winter are usually the seasons when we tend to bone up on our teas, infusions, and whatnots, in preparation for the flu season. Over the last few years, I’ve begun to pull back on the use of over-the-counter medicines in favor of home remedies and traditional health support herbs, etc.

My thoughts on conventional cold and flu drugs

Don’t get me wrong, there is a time and place for conventional pharmaceuticals, but I’ve since come to appreciate and realize that traditional remedies can be far more effective and less damaging to the body. I’m not making any health claims here, but for me, I believe traditional medicines seem better able to work in harmony with the body’s own natural mechanisms for healing itself.

Going back to my roots

Drawing on the traditional teachings of my own ancestors within my family as well as my own experience as a novice in herbalism, this is my preference. Always consult your own healthcare provider for any treatment regimes or medicines.  This simple spiced elderberry and echinacea tincture is one I love and have added to my home remedies cabinet! It’s cheaper and works best for me and mine even as I’m sharing this recipe with you.

**As always, make sure you check with your healthcare provider to ensure that these ingredients are safe for you to consume, especially if you have medical conditions or medicines that might interact with any of these ingredients!!
**Please also note that this post contains affiliate links and as an Amazon Associate I earn from qualifying purchases.

spiced elderberry and echinacea tincture pinterest blog image

Making my  batch of spiced elderberry and echinacea tincture

I always start with organic or homegrown ingredients especially, when it comes to something you’re going put in your body. If you’re like me and don’t have tons of space for a large backyard garden, I love the versatility of dried berries. Organic all the way baby, even the spices! There are so many recipe options for elderberry tinctures out there. I’m using this combination of spices and other ingredients because it not only tastes good, but the spices also have some healing benefits as well!

Simple things you’ll need for this recipe

  1. 1 cup of organic dried elderberries.
  2. Use high-quality alcohol like vodka or you can use rum. Just make sure it has a high concentration of alcohol; 80 proof).
  3. 1/4 cup of organic dried echinacea.
  4. 1/2 teaspoon of fresh ground nutmeg.
  5. Next, add 1/4 teaspoon of ginger powder.
  6. You will also need 1/4 teaspoon of ground cinnamon.
  7. 1/4 cup of organic raw honey (to be added after the curing process).
  8. Small and medium-sized wide-mouth mason jars.
  9. 1 oz Dropper bottle
  10. Cheesecloth (or a fine-mesh sieve)

About the two main ingredients

Echinacea: 

Well known for its many health benefits, echinacea reduces inflammation, improves immunity, and lower blood sugar levels. Also, it’s used as a natural pain reducer, helps with digestion as well as skin-boosting benefits too! Extensive research has been done on it’s medicinal properties and confirmed to be antifungal and antibacterial and is safe with few side effects. Also, for maximum effectiveness, it’s best to take it at the first signs of illness.

Elderberry:

Elderberries have been widely studied in Europe and believed to be one of the most potent natural plants for fighting cold and flu viruses. Not only that, they are loaded with antioxidants, vitamins, boosts, fights infection, and supports the immune system. Elderberries have powerful antiviral properties and are helpful for treating upper respiratory infections and reducing fever.

How to make your elderberry and echinacea tincture

Take all of your dry ingredients, including the spices, and fill your jars ½ – ¾ full. Next,  completely cover them with the vodka or rum and then tightly cover your mixture with the lid. Then, gently invert your mixture several times to ensure that the alcohol is fully incorporated. Store it in a cool and dry place (I use my pantry) for 4-6 weeks, periodically inverting it for the entire time frame.

Once it’s ready, simply strain the mixture with a cheesecloth or fine mesh (be sure to get as much liquid out as possible) and pour it into a dropper bottle or small jar. Don’t forget to date and label your tincture and include the recipe.

A quick note on storage

No refrigeration is needed because of the high alcohol content used in the process. This is why it’s important to use at least 75 proof or higher vodka, rum, etc because it has much lower water content plus a longer shelf life (a year versus a few weeks!).

Before you go

There are so many health benefits to be found in a variety of fruits, veggies, and herbs. From tinctures and syrups to dried fruit and vegetable snacks. Read my post on making nutritious homemade dried fruit snacks here!

About the author

Tonye Tariah is a Holistic Health Strategist and founder of Freedom at The Crossroads Blog. She helps free women from inaction and unhealthy habits so they can get fit, healthy, and live free. Her belief is that “the cookie-cutter method only works for cookies”. This means that she helps each woman in a way that is unique to each woman. By doing this, she’s better able to help them transform their lives from the inside out. Her ultimate goal is to help women become healthy and empowered through the transformative self-care journey!

Spiced Elderberry and Echinacea tincture

quick and easy dried fruit snacks blog feature image

Just the time for some dried fruit snacks

Quick and easy dried fruit snacks scream holiday to me! These recipes are perfect for this time of year and with the fall and winter seasons just around the corner, I’m all for switching things up with a combination of spices and fruits to create yummy seasonal snacks and treats.

A great alternative

Homemade quick and easy dried fruit snacks are a good alternative to junk food and prepackaged stuff from the grocery store. Not only is it healthier, but it’s also got none of the additives and mystery ingredients that you typically find in conventional store-bought snacks and treats.

The best fruits to use for these treats

While I’d love to say that every fruit makes for a delicious dried goody, that’s really not the case here. For the most part, you want to use produce that still keeps it’s integrity even when you dry them. Bananas, fresh apples, berries, apricots, etc make some of the best quick and easy dried fruit snacks.

Choosing and prepping your fruits (and veggies)

This is really a no-brainer! Select ripe fruits and berries because they usually have a nice level of sugar content.  Avoid fruits and veggies that have very high water content and are mushy. Next, wash your produce in cold water being careful to remove any blemishes. Next, extract any pits or stones from stone fruits like peaches and nectarines. Finally, you want to remove any stems from your berries and then cut and slice fruits evenly so that they will dry uniformly.

For your vegetables, they first need to be blanched. I prefer the method steam blanching method because you lose fewer nutrients. Bring water to a boil in a large pot with a tight-fitting lid. Remember, you’ll need the colander/ wire basket too.  Loosely place your veggies in the pot’s steamer basket (water should be no more than 2 inches deep). The rule of thumb is to time your blanching to roughly half the cooking time as you would normally use.

Once they’re done, quickly remove them from the heat and give them a quick cold water bath (or briefly run under cold water), pat dry, and place on a parchment sheet.

How to dry fruits and veggies using your oven

While a food dehydrator is one of the best methods to use (much faster ), your home oven can still get the time done and it’s way cheaper! To maintain the natural color of your snacks you can either soak them in lemon juice for ten mins or pray them with a mixture of ascorbic acid powder and water (vitamin C)

Before you start the drying process, set your oven between 130-160℉ and line a cookie sheet with parchment paper. Next spread out your slices in a single layer and rotate in the oven every two hours until dry.  You’ll know they’re dry when they become a little leathery and are nice and flexible.

General dry times

The drying time for most of these ranges anywhere from 6-12 hours! Peaches, bananas, and apples need about six hours to dry while most berries range from 8-12 hours (i.e. cherries need 6-8 and strawberries to need 12 hours). All you need is a little bit of patience and you’ll have delicious, healthy snacks at the end of the process.

Supplies you’ll need

  1. Ascorbic acid powder (vitamin C) or lemon juice (enough to soak all your fruit).
  2. Parchment paper; I like to use Reynolds wrap parchment paper (although generic works too but not the same quality).
  3. Silicon baking mat (place on top of fruit slices so they dry flat)
  4. Deep pot with a tight-fitting lid (this one has everything you need!)
  5. 1 wire basket (you can skip this if you already have a pot that has a steamer insert)
  6. Your fruits and veggies selection.

A note on food preservation

These quick and easy dried fruit snacks are also a great way to reduce food waste as well as preserve seasonal fruits and veggies. It’s also good for the wallet too! You not only save money but, you’re still eating healthy too. These snacks might be dried, but they are also packed with nutrients. For ideas on this and how it can help you really stretch your grocery budget, read Quick and Easy Food Storage Tips


About the author

Tonye Tariah, Holistic Health Strategist and founder of Freedom at The Crossroads Blog. She helps free women from inaction and unhealthy habits so they can get fit, healthy, and live free. Her belief is that “the cookie-cutter method only works for cookies”. This means that she helps each woman in a way that is unique to each woman. By doing this, she’s better able to help them transform their lives from the inside out. Her ultimate goal is to help women become healthy and empowered through the transformative self-care journey!

Quick and Easy Dried Fruit Snacks

fresh produce, food preservation and storage blog image

Staying healthy right now is even more important right now

These uncertain times make it even more important that we become more sustainable and environmentally conscious. Fresh produce storage is one way we can really lessen the impact on our wallets and eat healthily! We also know how expensive groceries can become especially when you move between seasons or making a huge shift in how you feed yourself and your family. So what about finding creative and sustainable ways to lower our grocery bills while at the same time, living a healthy lifestyle?


As I’ve stated in earlier posts, don’t be deceived by marketing gimmicks and misinformation campaigns promoted by both big agribusiness and the processed food industry. You can do a lot better for yourself and your family, by buying fresh and locally sourced meats and produce. Given the state of things globally, it’s safer to stay local and buy from trusted local farms!

A few observations about food and eating well during difficult times

If the pandemic has shown us nothing else, our food systems and supply chain are both vulnerable and sustainable! Plus, remember, labels, and where your food comes from, matters!

Labels on the matter of our food and so do the methods of food production. Foods that have been cultivated using conventional means (i.e. large-scale pesticide and herbicide use, etc) are much more likely to contain damaging levels of these residues. We as consumers can not rely on these industries to “self-regulate” as their track records have shown them to be less than honest when it comes to putting consumer safety and health above their stock portfolios.

Also, while the FDA and USDA have traditionally been the only real advocate for consumers, both agencies have been severely hindered and compromised by lobbying interests as well as well-crafted efforts to defund these agencies in an effort to misinform the public regarding our food sources, what’s in our foods, labeling practices by the processed food industry and big agribusiness.

The reality is this: what food you put in your mouth will either poison or nourish your body, depending on where it comes from. If it comes from a country with no or poorly standardized food safety requirements (i.e. mercury levels in fish, pesticide use in produce, additives in frozen, processed and or packaged foods, etc), YOU need to SERIOUSLY rethink your food choices!!

Part of being able to feed your family with safe nutritious foods means you must adopt a sustainable way of accessing the right foods for your table. In practical terms, that means finding ways to minimize waste and unnecessary costs due to spoilage and improper food storage.

With that in mind here are a few quick tips:

1. Your fresh herbs will last longer and be less likely to spoil when you store them properly. Fresh herbs, like basil, asparagus, and green onions will last a good while if you store them upright in a jar of freshwater. Simply trim the stems, cover them with a piece of plastic wrap, and place them in the refrigerator for storage and use as needed.

2. Be aware of where to store fruits and vegetables. Not all fruits and veggies require refrigeration and in some instances, refrigeration affects the taste quality of some fruits and vegetables. For instance, avocados (yes, technically it’s a fruit because it has a seed y’all), citrus, bananas, nectarines, pears, peaches, onions, tomatoes, and potatoes do best outside of your fridge at room temperature or in your pantry. A quick warning though; don’t store onions and potatoes together due to the ethylene gas which can cause them to spoil each other faster.

Some more quick and easy tips

1. I’ve been doing this for years ( thanks, momma), but did you know it really helps when you wrap your greens in paper towels. They’re great at preventing slimy residue from accumulating and making a science experiment in your bag of lettuce, spinach, or other leafy greens. Simply use paper towels to soak up excess moisture and lightly wrap your green in a few paper towels. This also works for leftover salad greens in food storage containers (minus the salad dressing of course).

Keep your bananas from getting ripe too fast!

2. Cover the crown of your bananas bunches with plastic wrap. It helps slow the release of that ethylene gas which is the meany responsible for breaking (the natural process that causes your produce to spoil) down one of my go-to mid-morning snacks. Doing this is a good way to preserve your bananas if you’re not going to eat them right away.

3. Did you know wrapping your bunches of celery in foil helps it stay fresh and crunchy for up to as much as four weeks?  Yep, wrapping it up in foil and then placing it in your fridge’s crisper drawer will help extend the life of your celery. The foil does this by allowing just the right amount of moisture in, and the ethylene gas out.

4. Stop! Don’t wash all your produce at once. I know it’s counter-intuitive but it’s much better to wash your produce as you go if you want to maximize its shelf life. Unless you plan on freezing your food, you should only be washing things you’re ready to eat right away or soon after. This will reduce the chances of mold growing on damp produce.

Preventing moldy berries!

1.  Another “who’d a thunk it?” If you want to keep those berries mold-free, soak them in vinegar. If you’re not going to consume them all at once, simply soak your berries in a solution of three parts water, one part vinegar in order to kill bacteria and prevent molding. Once you’ve done that, give the berries a thorough pat dry and store in the fridge.

A tried and true preservation technique

2. Another great time saver and a great way to preserve your veggies to simply roast them prior to storage. By roasting vegetables such as broccoli and cauliflower,  you can extend their shelf life. Not only that, but it’s also a great meal prep tip to have cooked veggies on hand that you can quickly incorporate into any meal.

Storing dairy products

1. Store dairy products at the back of the fridge. While it may make for easy access, keeping your milk at the front of the fridge makes it more prone to spoilage due to temperature differences. This is because the back of the fridge is colder and will, therefore, give your dairy products are longer shelf life.

Storing meat products

2. Place your meats on the bottom shelf so that their juices do not drip on other food items (i.e. produce, etc) and contaminate them. If space is an issue, place your meat products on a tray or inside a leak-proof container in order to catch any drippings. Better yet, prep and package your meats into manageable portions (i.e. serving sizes for soups, meals, etc) and then store them in the freezer until you’re ready to cook your meals. Also, separate lunch meats from raw meats in order to prevent illness associated with cross-contamination.

Grain storage

1. I can say this enough! Store grains in air-tight containers!! While buying in bulk is a great way to save money when grocery shopping, you want to make sure that you store it correctly so the extra food doesn’t go to waste. Be sure to transfer your grains into an airtight container to maintain freshness, as well as keep those pesky bugs away. Do yourself a favor by labeling your containers with the purchase dates so you’re able to keep track of expiration dates and avoid wasting stored foods.

Just a reminder about fresh produce storage and preservation

Always Double-check your fridge’s temperature especially as the seasons’ change (i.e. summer vs. winter months). You want to make sure that your fridge is set at the correct temperature and that your thermostat is in proper working order to prevent spoilage and reduce the risk of food born illnesses. The recommended temperature is 40 degrees Fahrenheit or 5 degrees Celsius for those of you who are using the mks measurement system.

Final thoughts on fresh produce storage and food preservation ideas

I get it. We now live in scary and difficult times. You might even question whether fresh produce storage, etc is even a priority. But it is. We have to have consistent, sustainable access to fresh foods if we want to keep ourselves healthy and less susceptible to illness (i.e. COVID 19)! You can save a lot of money and still maintain a healthy lifestyle (critical for these times) by using simple and creative ways your perishables. In short, fresh produce storage hacks can literally save your life!

And one more thing!

Want to really 10X a healthy lifestyle? Incorporate radical self-care into your daily routines starting today. You can get some ideas from my article on “14 ways to love your self…” right here!

Before you go

If you’re still not sure where to begin, grab my FREE Pantry Detox Gude GUIDE HERE

For the complete Introductory Produce, Shopping Guide grab a copy HERE!!

Fresh produce storage and preservation Pinterest image
About the author

Tonye Tariah, Holistic Health Strategist and founder of Freedom at The Crossroads Blog. She helps free women from inaction and unhealthy habits so they can get fit, healthy, and live free. Her belief is that “the cookie-cutter method only works for cookies”. This means that she helps each woman in a way that is unique to each woman. By doing this, she’s better able to help them transform their lives from the inside out. Her ultimate goal is to help women become healthy and empowered through the transformative self-care journey!

Fresh Produce Storage and Preservation

It’s Selfcare weekend again and it’s all about the lovely locks today. This is a time when we’re all looking for ways to save money, but still, keep every part of ourselves healthy. That also includes ensuring that your hair and scalp are well-nourished, balanced, and healthy! Today, I’m sharing a recipe for my favorite hair tonics, the apple cider vinegar hair rinse!


Just an FYI: this post does include some affiliate links at no cost to you. I do receive a small percentage resulting from any purchases you make via my shop easy links. 😉

Over the last few months my love of all things wellness, especially DIY, have been reinvigorated and turned up to 10!  The universe has also conspired with “these times” to reconnect me with my herbalism roots. As a young girl growing up in Nigeria, I was always fascinated by the discussions my uncle, a traditional herbalist and naturopathic doctor( even before that was a thing) would have with my mom, an educator.


Some favorite family memories and my herbalism roots:

Whenever he would fly in from the UK or some “exotic” place (yeah, India and Asia were always magical to a kid like me), he and my mom would discuss and debate about everything from holistic medicine, herbs, etc to conventional medicine and our flawed and inadequate healthcare ( it’s the same by the way!)systems.

Now, because of and some might even say, destiny, I find myself working in the health care field motivated to embrace my herbalism roots and traditional modes of supporting the body’s health. Not that it took a global pandemic to get me here; my own healthcare journey has been leading me in this direction for some time.


Why I’m getting back to basics:

Now, as I watch the failings of both conventional medicine and unsustainable healthcare infrastructures built on flawed market-centered principles rather than on human health and dignity, I’m reconnecting with my ancestral wellness teachings.

My self-care hair treatment is just one of several recipes in my personal materia medica (herbalism recipes). Each ingredient is geared toward supporting and optimizing the natural health of both the hair and scalp!

An FYI:

Just so you know, you can always tweak this recipe and make it your own, depending on your needs or intent. Also, I make no claims to being a healthcare provider, doctor, or practitioner. These are my own traditional herbal recipes that been passed down to me via oral tradition as wells as my own creativity. Bottom line, do your research, and when in doubt, contact your primary care physician, provider, dermatologist, etc.


Apple Cider vinegar Hair & Scalp Rinse (Organic)

1. I 1/2 cups of filtered water

2. 5 tablespoons organic raw coconut oil

3. 10 drops lavender essential oil

4. 8 drops rosemary essential oil

5. 8 drops peppermint essential oil

6. 4 drops tea tree oil

7. 1/4 cup organic apple cider vinegar

I use a variety of brands for sourcing my essential oils but for a budget-friendly and good quality brand, I recommend Now Brand Essential oils. Whichever brand you use, make sure it’s one you know and trust!


* Never apply any essential oil directly to the skin or scalp as they can cause irritations, burns, or other adverse reactions. Also, if you have sensitive skin or allergies to any of these ingredients, be sure to check with your dermatologist or health care provider to ensure that they are safe for you to use.


Blog image

Items Needed:

1. 3.4 oz, 8 oz or 16 oz spray bottle, preferably glass for prolonged storage in the fridge as plastic tends to break down and could possibly react with essential oils mixture)

2. All of the ingredients listed in the recipe above

3. sharpie marker for recording date and time of creation.

4. Sticky label (waterproof or you can simply affix it to the bottle or use clear packing/masking tape over the writing on the label). 


Storage:

This mixture should ideally be stored in the fridge no more than a  few days; 1-week max since there are no preservatives in this DIY recipe.


Benefits of the apple cider vinegar & rosemary hair rinse:

1. Apple cider vinegarstrengthen hair and improves luster by lowering hair and scalp pH. It may also reduce scalp infections and itchiness. Apple cider vinegar has been shown to thicken hair and remove dead skin cells that can clog follicles and hinder your hair’s ability to grow. 

2. Lavender essential oil promotes and encourages hair growth, is antimicrobial, reduces skin inflammation (anti-inflammatory), and also has a relaxing effect (aromatherapy). 

3. Rosemary essential oil stimulate follicles, strengthening hair from the root to the tip (making hair longer and shinier), and reduces hair loss. 

4. Peppermint essential oil– shares some of the same antimicrobial properties as tea trea oil as well as helping to cool the scalp, eliminate dandruff, and encouraging hair growth.

5. Tea tree essential oil unclogs hair follicles and is antimicrobial and also antiseptic. This essential oil is also beneficial for the hair and scalp given that it helps remove the build-up of dead skin cells, oil, and styling products. It also increases oxygen and nutrient supply to the hair follicles.

6. Coconut oil aides overall scalp health, fights dandruff, thickens, and moisturizes dry hair. Coconut oil also reduces breakage and split ends.


Apple Cider Vinegar Hair Rinse

blog feature image

For me, nothing says self-care like a homemade creamy avocado face mask. My unending love affair with avocados, won’t be over anytime soon, lol! Today I decided to share one of my go-to Avocado face masks that are great for a dewy complexion and a must for the summertime (I’ve switched up my recipe since my last blog post and this version is just as awesome).

DIY Fresh Avocado Face Mask: Ingredients

1. Avocado: An excellent ingredient for moisturizing the skin, it’s a good source of potassium which is also known as the ”youth mineral”. Avocado also boosts collagen production, contains vitamin E, softens, reduces the appearance of fine lines, and wrinkles. This recipe requires one ripened, medium-sized avocado (enough for two applications).

2. Turmeric: helps with acne scarring, anti-inflammatory; calms the skin, dry skin, wrinkles, contains antioxidants and helps with a variety of skin conditions. You will use one tablespoon (organic) of turmeric powder as part of your face mask recipe.

3. Raw honey: antibacterial, loaded with antioxidants, moisturizing, soothes the skin, evens complexion (lightens the skin), heals the skin, and aids in regeneration (I’ve also got an awesome raw honey face mask recipe too! I typically add one to two tablespoons of raw honey to my mixture.

4. Cinnamon: helps eliminate acne and pimples on face and body ( kills bacteria associated with acne production), anti-fungal, adds moisture to the skin by improving blood flow to the surface of the skin, stimulates skins natural collagen, fades acne scars, blemishes, etc. This recipe requires cinnamon powder and not the sticks! You don’t need a lot of cinnamon for your DIY mask; simply use 1/2 a teaspoon full.

5. Spirulina: A blue-green algae rich in antioxidants, vitamins C and E which help reduce inflammation and neutralizes the damaging effects of free-radicals. It also detoxifies, tightens, brightens, lifts, and hydrates the skin. Be sure to add one level tablespoon of organic spirulina and be sure to fully incorporate it into your mixture.

Avocado Face Mask: Preparation

Make sure the avocado is well-ripened. Next, use a fork or hand mixer to blend the honey and avocado mixture. Gradually add in the dry ingredients and blend until fully incorporated and chill the mixture in the fridge for 5-10 minutes. Any surplus face mask mixture can be stored in the fridge for a few days in a tightly sealed container to avoid oxidation.

DIY Avocado Fresh Face Mask: Usage and application

Apply your mask to clean dry skin and leave on for 10 -15mins and then rinse off with tepid water. Follow up with your usual skincare routine afterward. Have you tried any of my other recipes? Check out this recipe from an earlier post right here!

About your ingredients: Where I get mine

A rule of thumb for me is to always buy your ingredients from trusted sources. Even when I buy produce from conventional grocery stores, I make sure that they are organic. The same applies to most of the spices used in both my culinary and DIY recipes.

Etsy is also a great place to shop online for both locally sourced and organic ingredients. While I do recommend amazon for some things, when it comes to food grade items and spices, I stick to local and organic for best practices. In my experience, you’re less likely to get poor quality and or contaminated items.

If Etsy is not an option for you can buy some of your ingredients from amazon once you’ve done some in-depth review of the vendors (I start with the average review score coupled with what the lowest customer review state. It’s a good way to get past those reviews that are either paid or promotional).

DIY Fresh Face Mask: Usage and application

Apply to clean dry skin and leave on for 10 -15mins and rinse off with tepid water. Follow up with your usual skincare routine afterward. Have you tried any of my other recipes? Check out this recipe from an earlier post right here!

About your ingredients: Where I get mine

Rule of thumb for me is always buying your ingredients from trusted sources. Even when I buy produce from conventional grocery stores, I make sure that they are organic. The same applies to most of the spices used in both my culinary and DIY recipes.

Etsy is also a great place to shop online for both locally sourced and organic ingredients. While I do recommend amazon for some things, when it comes to food grade items and spices, I stick to local and organic for best practices. In my experience, you’re less likely to get poor quality and or contaminated items. When I go grocery shopping, I always keep this in mind whenever I’m picking up produce and meat items.

Speaking of grocery shopping, If you’re feeling overwhelmed about how to shop for fresh food items that are pesticide-free and minimally processed, you can grab my Introductory Produce and Pantry Detox Shopping Guide grab a copy HERE!!


blog post photo link


“Avocados are packed with powerful anti-oxidants that fight the appearance of dark spots and helps heal the skin!”


A little about Tonyé

Tonye Tariah, Holistic Health Strategist and founder of Freedom at The Crossroads Blog, helps free women from inaction and unhealthy habits so they can get fit, healthy, and live free. Her approach is “the cookie-cutter method only works for cookies,” meaning she helps each person in a unique way helps them transform their lives from the inside out. She’s not about helping you lose weight quickly. She’s about changing your habits and helping you fall in love with yourself so you can live a life with pure joy.


The DIY Avocado Fresh Face Mask!

feature image for the black experience in America: essential readings

The Black Experience in America has not been easy! As a result of the civil unrest that we are currently facing, I decided to pull together some books to shed light on this topic. These protests largely brought on by the murder of an unarmed Black man in Minneapolis over a week ago.

I have to say that as a member of the African-American community, it’s been a time of great mourning, anguish, and rage at yet another such incident spanning less than a two month period. In light of these troubling issues surrounding race and human rights here in the US, I feel it’s necessary to provide a helpful collection of books and resources to educate others about the Black experience in America as well as the importance of diversity education in our society.

*Please note that this post may contain affiliate links and as an Amazon Associate, I earn from qualifying purchases at no cost to you*

A Brief Recap of the incident that led up to this

The Black Experience in America has historically not been an easy one. George Floyd is just one of the thousands of black men, women, and children murdered by racist forces within this nation, over the years. From state-sanctioned killings, alleged lynchings in the South, etc, it’s safe to say that African-Americans are tired. What’s playing out in the media is simply the Black Community crying out, enough! Joined in solidarity by nations throughout the world who have witnessed this latest atrocity in horrific detail, millions of Americans and countless many others world over have risen up in civil disobedience. The Black Experience is full of these sorts of accounts and people are done!

Things are due for a change!

The bill is finally “coming due” on America’s history of systemic racism and discrimination. It’s 2020 and we’re still facing this century’s first global pandemic and this too happens! We are all shocked and dismayed at the killing of yet another unarmed African-American at the hands of “law enforcement”. Yet again, seemingly allowed to take lives both recklessly and without consequence!

Why it’s necessary to discuss the Black Experience right now

To say the stress and uncertainty of the COVID 19 pandemic played a role is an understatement. Without going too far into the woods, most African-Americans will tell you they saw this coming. The Black experience in the United States has been one of slavery, “Jim crowism”, segregation, racial profiling, and outright discrimination. While most Caucasians prior to the killing of George Floyd would say much has changed since America’s past racial atrocities, few can say that with a straight face today.

When we take the time to learn about each and embrace diversity, we learn about ourselves and our shared humanity. Each group has its bad actors but one thing we can all agree on, we are all human and deserve dignity. No one group is better than the other, and COVID 19 has proven to us, that we are all in this together.

Some questions being asked right now:

Many people have asked, how have we come to this? Again, most of us who share in this Black experience will say, why did it take so long to get to this point? To the place where millions of people and hundreds of nations around the world are finally taking action on years of trauma inflicted by a government on a segment of its population? It’s safe to assume that many who are reading this post right now, are feeling uncomfortable and even offended.  The good news is that if this makes you uncomfortable, it means your mythological bubble of an “equal” America has been shaken up!

The uncomfortable truth America needs to face regarding the Black Experience

So what’s the solution? Here’s the thing,  REAL CHANGE is rarely if ever, about being comfortable. Until America owns the fact that it was built on the backs of Black Africans brought to these shores, brutalized, raped, and sold like chattel, very little will change. Let’s not forget the hundreds of Native Americans who have also been disenfranchised and marginalized with a history that is equally as horrifying as that of the Black experience to date.

This is not to say that things have not improved from those nightmarish days of slavery. However, these same destructive structures that existed then, have yet to be dismantled and restitution made. Needless to say, that is something that needs deeper discussion! We can all agree there’s work that needs to be done to address these grievances and a good place to start is to learn about the black experience in America. Through our literature and discourse, others can share our experiences and listen to our stories and so much more.

Black America’s anger and hurt are justified

America is long overdue when it comes to doing right by the descendants of those stolen from their homelands to be slaves in a foreign land. Nearly 50 years after his assassination,  Malcolm X’s words ring even louder in 2020. Back then and even now, White America has struggled with these issues.  Malcolm X’s words are true when he said: White Americans to cling to the myth that ” American society is essentially hospitable to fair play and steady growth toward a middle-class Utopia embodying racial harmony. But unfortunately, this is a fantasy of self-deception and comfortable vanity.”

My final thoughts and recommendations

I could say so much more about the gut-wrenching emotional roller coaster I’ve been on; the praying and yes, my rage that MY PEOPLE are still fighting for equality and justice in 2020. I take little solace in the fact that in other parts of the world, Europe included, POC continue to fight similar battles for equality and basic human rights.

The Coronavirus has stripped the United States bare of its masks, platitudes, and wilful blindness. I remain hopeful that the US will seize this opportunity for meaningful change during this dark time in our history. Change is inevitable and if we are to grow and evolve into the best version of ourselves, we must do the work both individually and collectively!

Time for a re-set?

This is a re-set; a time for meaningful progress and creating pathways towards healing the trauma suffered by those who have been discriminated against and marginalized in our society. It’s truly time to tear down all of the racist and xenophobic structures that have brought this nation to its knees. Healing begins with acknowledgment, structural change, and yes, restitution.


With that in mind here is a list to help you begin to learn more about the Black Experience

  1. The Fire Nex Time, by James Baldwin
  2. Freedom Is a Constant Struggle, by Angela Y. Davis
  3. White Fragility: Why It’s So Hard For White People To Talk About Racism, by Robin Diangelo
  4. Women Race & Class, Angela Y. Davis
  5. Between The World And Me, by Ta-Nehisi Coates
  6. Fierce Angels, by Sheri Parks

feature image for the black experience in America: essential readings

A few things before you go

I’m always adding to my collection of recommended must-reads so stay stunned for more right here!

To further help you along, here’s a link to my ever-expanding virtual bookshelf where you can grab your copy of all or some of these insightful books right here!

Expanding our mental horizons makes us all better humans and at the end of the day, we should all strive toward that goal. While you’re at it, don’t forget to read my must-have women’s book reviews for 2020 right here!

Don’t be a stranger! You can feel free to connect with me on IG  right here  tonyetariahhealth

You can also join my youtube community right here and don’t forget to like and subscribe!


About the author

Tonye Tariah, Holistic Health Strategist and founder of Freedom at The Crossroads Blog, helps free women from inaction and unhealthy habits so they can get fit, healthy, and live free. Her approach is “the cookie-cutter method only works for cookies,” meaning she helps each person in a unique way helps them transform their lives from the inside out. She’s not about helping you lose weight quickly. She’s about changing your habits and helping you fall in love with yourself so you can live a life with pure joy.

The Black Experience In America: Readings

Verified by MonsterInsights